An extract from 'A Harvest of Wax Fruit', published in 'Early American Crafts & Hobbies', by R.F. & M.W. Yates (New York, 1954):
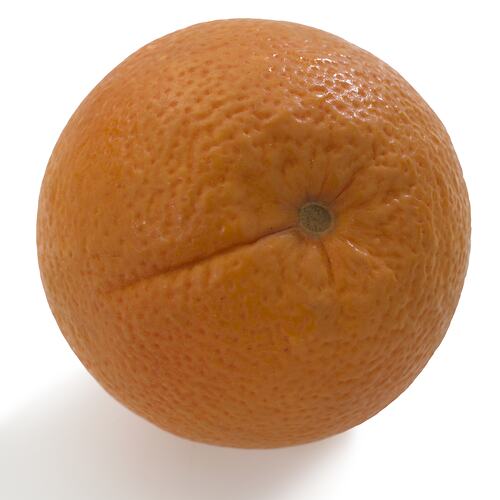
Wax fruit was cast in plaster-of-Paris moulds. When you learn how to cast an orange or an apple, you can cast any fruit - lemons, cucumbers, or bananas. We will use an orange as an example.
The first venture requires very little material, all of it inexpensive and readily available. A pound package of plaster of Paris, a strip of tin about 3 inches wide. This tin is to be bent in to a ring with a diameter great enough to leave 1 inch of space between it and the orange when it encircles it, plus a slight allowance for overlapping at the ends.
These, with a coffee tin, three small marbles, a ruler, piece of string, large spoon, paint brush, some fine sand (the cleaner and finer the better), wax, and colouring matter.
Fill the coffee tin with moistened sand and level off the excess. Then press the orange down into the sand (stem up) until a little less than half of it is immersed in the sand. Pressing down the orange will, of coarse displace some of the wet sand. This excess sand around the 'equator' should be carefully leveled off a second time with a ruler edge.
Ready now to use the strip of tin, you bend it into a ring of such diameter that when it is placed over the orange there will be about an inch of space between the orange and the inside of the ring. Since you may be using this strip of tin again and again, you needn't solder the joint for the ring, simply overlap the strip at the outside of the ring and fasten with string wound tightly and tied. Before actually inserting the ring, press the three small marbles half-way down into the moist sand around the orange; they should be set at equal distant intervals, half the distance between the orange and the eventual position of the ring. The marbles play an important part. This plaster of Paris mold for the orange will be in two parts, and you are now making the first half. It is imperative that both halves of the mold come together perfectly; that is, they must line up. The marbles are put in place so that the first half will have three depressions left in it to guide you in making a two-piece mold that will fit together.
Next, the tin ring is slipped over the orange and the marbles and is pressed down into the sand until only half an inch of the rim is exposed above the orange. The mold set-up is now ready for pouring the plaster. In preparing and pouring it you must work rapidly. Clean water is added to a few ounces of plaster until it has a creamy consistency. If the amount is insufficient, you can quickly prepare more. Gently pour the mixture over the orange until the tin ring is filled to the top, completely covering the orange. Let the work stand until the plaster of Paris hardens enough so that a slight impression can be made with the finger. This requires only a few minutes.
Lift the whole thing out of the sand: ring, orange and marbles. Cut the string and remove the plaster casting from the ring. The orange and marbles embedded in the mold can be easily removed and you have a perfect cast of marbles and orange. Some sand will cling to the plaster; it should be lightly brushed away. The surface to which the sand adhered can also be smoothed up with a knife if neccesary. The plaster should still not be too hard to prevent doing this.
Preparation of the second half of the mold is much easier. Put the orange back into the first half of the mold as close as possible to its original position. Then, using a small brush, paint the edges of the first half of the mold, including the holes made by the marbles, with melted tallow or wax. This prevents the fresh plaster from adhering to it.
With the stem end down, tightly encircle the orange with the tin strip and tie it firmly with a string. Pour the plaster over the orange as before. After it has hardened, insert the blade of a knife in the joint and separate the two parts, again removing the orange. The mold is now ready for use.
The wax itself may be ordinary paraffin, old candles, almost anything. However, take precaution of melting the wax, whatever it may be, in a double boiler, or a serious fire may result. For fruit of a solid colour such as oranges and lemons, the wax is coloured before casting is made. Add a little turpentine to any of the colours ground in oil in a pan and pour the mixture into this while it is molten. Thorough stirring distributes the colouring matter uniformly through out the wax. Colours may be mixed in the ordinary way. It might be useful to melt a bit of wax and to mix various colours into it before you actually cast the fruit. You may be surprised by the little amount of wax needed.
Now for the actual casting. Since it is hollow, very little wax is needed, about half an average candle will do. Preheat the mold before you begin casting. It should be left in very hot water for ten minutes to make sure that the heat has permeated through it. Thus, you prevent the wax from sticking to the surface when the orange is cast.
While the mold is being heated, you can melt the wax in the double boiler and stir in the colour. The wax should be warm enough to ensure sufficient fluidity. Then, remove the mold from the hot water and carefully pat (not wipe) it dry with a clean cheesecloth or other absorbent fabric. Any attempt to wipe the mold dry inside will tend to destroy the natural irregularities of the orange cast into the surface of the plaster. Holding half of the still-hot mold in one hand, fill it three-quarters full of hot wax.
Reference
'Delicious Deception: Wax Parlor Art in Nineteenth-Century America'. Gastronomica. Winter 2004, Vol. 4, No. 1, pp.10-12. Posted online on March 7, 2004. (doi:10.1525/gfc.2004.4.1.10)
More Information
-
Keywords
-
Authors
-
Article types